

How To Do Color Splash In Photoshop
No time for making selections? Learn how to create a quick and easy Color Splash effect in Photoshop with just a Gradient Map adjustment layer, a layer mask and a brush! Not bad for nature and landscape photos. For Photoshop CC and CS6.
In this Photoshop tutorial, we'll learn a super easy way to add a colour splash event to a photo! A "color splash", as well known equally "selective color", is where we convert an image to blackness and white and then restore the color in just i surface area. Normally, we restore the color in a specific object, like a dress or a flower. In fact, I cover a elementary fashion to practise that in our Piece of cake Selective Color Effect tutorial where I bring dorsum the color in a woman's red dress.
But for certain types of photos, particularly outdoor landscapes, information technology can be more than effective to restore the colour non in any one object but in a general area. Often, landscape photos lack a clear subject, leaving the viewer'south eye to wander. By limiting the color to just one surface area, similar the leaves on a tree or the water under a bridge, nosotros simplify the scene by bringing focus to that surface area. This can be a great mode to create a more interesting and compelling image, and it's likewise but a really cool result and a lot of fun! And, because we're non choosing anything specific in the image, at that place's no need to make any time-consuming selections. Ordinarily, a single click with a brush is all we need!
What You'll Learn
To create the color splash effect, we'll utilise a Gradient Map aligning layer to quickly convert our image to black and white. Then, we'll use the Gradient Map's congenital-in layer mask, along with Photoshop's Brush Tool, to instantly restore the color in a single area. Finally, we'll fade the colour then that information technology blends in better with its black and white surroundings, and we'll practice that using the layer mask options in the Properties console. Once yous know the steps, the entire colour splash effect takes only a few minutes from first to end. Let's see how information technology works!
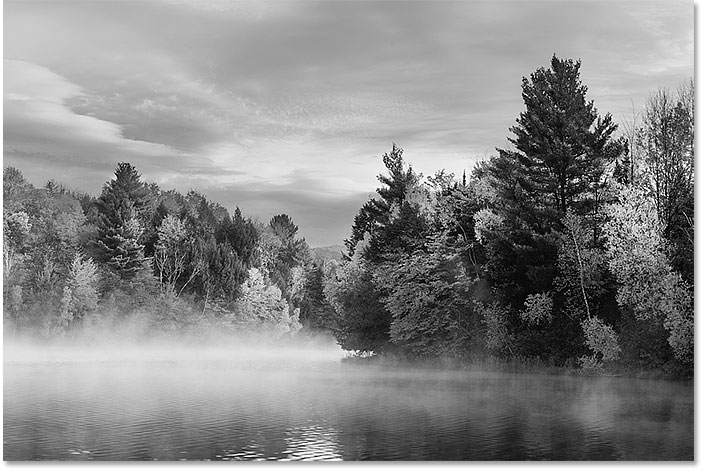
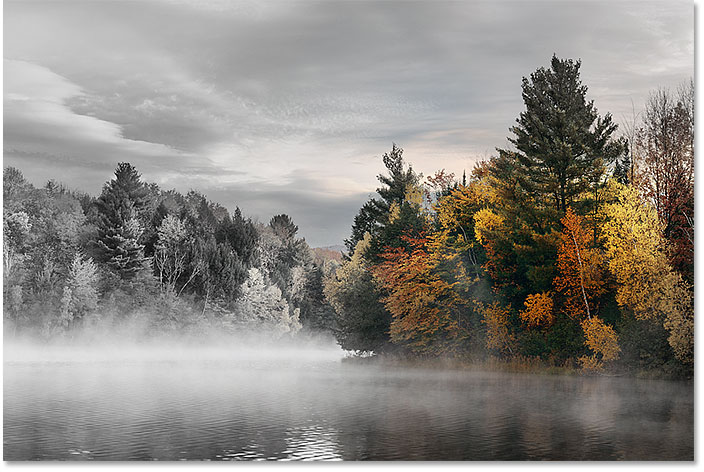
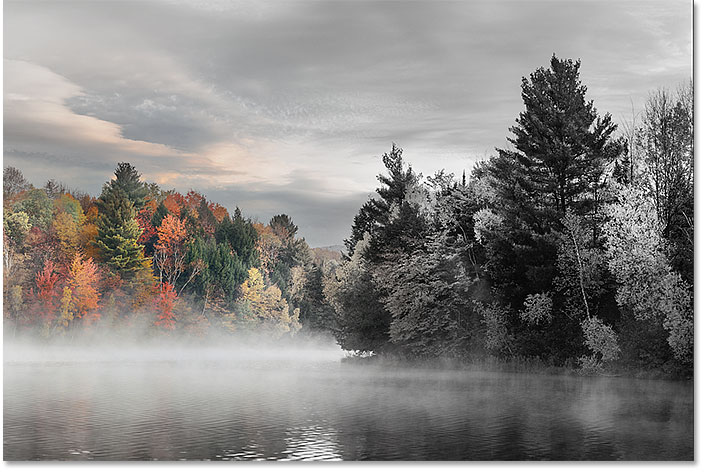
Here's an example of what the final colour splash effect will look like when we're done. Notice that but the trees on the left are in colour while the rest of the epitome remains in black and white. We'll learn how to arrange the intensity of the colour to amend lucifer your specific image at the end of the tutorial:

The concluding "color splash" upshot.
Let'south get started!
How To Create A Colour Splash Consequence
For this tutorial, I'thousand using Photoshop CC just every step is compatible with Photoshop CS6.
Step 1: Open up Your Paradigm
Starting time by opening an epitome into Photoshop. Here'south the image I'll be using (autumn leaf photo from Adobe Stock)
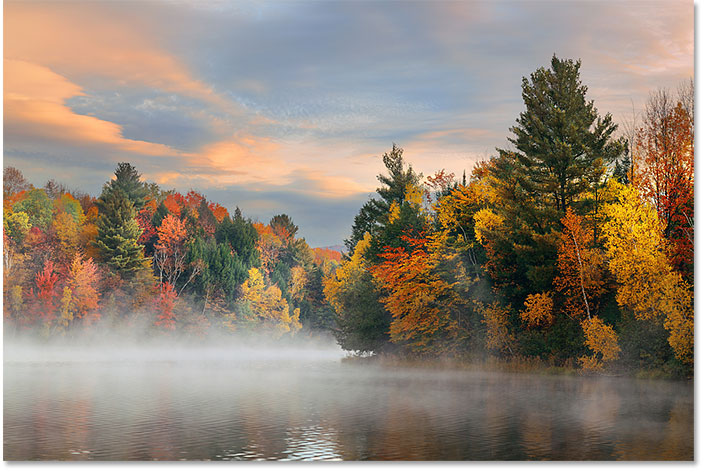
The original image. Photograph credit: Adobe Stock.
Sentinel the video and share your comments on our YouTube channel!
Step 2: Prepare Your Foreground And Groundwork Colors To The Defaults
In a moment, we'll use a Gradient Map adjustment layer to catechumen our color paradigm to black and white. Just in order for it to work, we first need to make certain that our Foreground and Background colors are set to their defaults. You can see your current Foreground and Background colors in the colour swatches near the bottom of the Toolbar. By default, the Foreground color (upper left swatch) should be black and the Groundwork colour (lower right swatch) should exist white. If you lot're seeing dissimilar colors, press the alphabetic character D on your keyboard ("D" for "Defaults") to reset them:
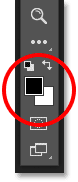
The default Foreground (upper left) and Background (lower right) colors.
Step 3: Add A Slope Map Aligning Layer
If nosotros look in the Layers panel, we come across our image sitting on the Background layer:
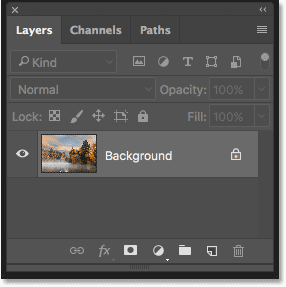
The Layers console showing the original image.
We need to convert our prototype to blackness and white, and we can do that very quickly using a Gradient Map image adjustment. Merely rather than making a permanent modify to the image, we'll utilize the Gradient Map as a not-destructive adjustment layer. Click on the New Fill or Adjustment Layer icon at the bottom of the Layers panel:
Clicking the New Make full or Aligning Layer icon.
Then, choose Gradient Map from the list:

Choosing "Gradient Map" from the menu.
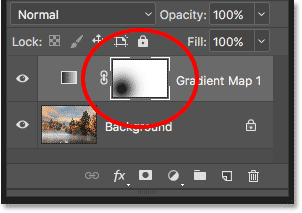
Photoshop adds a Slope Map adjustment layer named "Gradient Map 1" higher up the image on the Background layer:
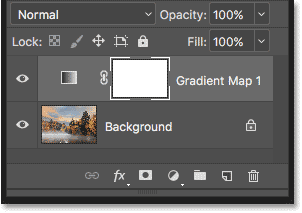
The Layers panel showing the new Gradient Map aligning layer.
And, the Gradient Map instantly converts our image from color to black and white. For more control over the black and white conversion, you can too use a Blackness & White adjustment layer. But in virtually cases, the Gradient Map works fine for our color splash consequence and gives us great results:
The image afterwards converting it to black and white using the Slope Map adjustment layer.
Stride iv: Select The Brush Tool
If we expect once more in the Layers panel, we see a layer mask thumbnail on our Slope Map adjustment layer. That's considering adjustment layers in Photoshop include a built-in layer mask. Notice that the thumbnail shows a white highlight edge around it, which tells u.s. that the layer mask is currently selected. We'll utilize this layer mask to bring back the color in office of the image:
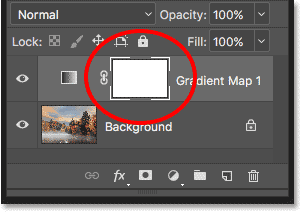
The layer mask thumbnail for the Gradient Map adjustment layer.
To practise that, we'll paint on the layer mask with black. Select the Castor Tool from the Toolbar:
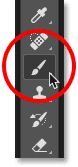
Selecting the Brush Tool.
Stride 5: Set Your Foreground Color To Black
Photoshop uses your current Foreground colour as the brush color. So to paint with black, we need to set our Foreground color to blackness. Earlier, when we reset our Foreground and Background colors to their defaults, Photoshop set the Foreground color to black and the Background color to white. So you might think we're good to go.
But if nosotros look over again at the color swatches in the Toolbar, we meet that Photoshop has swapped the colors on usa. The Foreground color is now white and the Groundwork color is blackness. That'due south considering we at present have a layer mask selected. It gets confusing, but the default colors when working with layer masks are the contrary of what they unremarkably are:
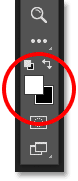
The Foreground and Groundwork colors have been reversed.
To set the Foreground color dorsum to black (and the Background color back to white), printing the letter Ten on your keyboard to bandy them:
Press "X" to swap the Foreground and Background colors.
Footstep 6: Lower The Hardness Of The Brush To 0%
With the Brush Tool selected, right-click (Win) / Control-click (Mac) anywhere within the document window. This opens Photoshop's Castor Preset Picker. Make sure that the Hardness value is lowered all the way down to 0%. This gives our brush a soft, feathered edge so that when we paint, nosotros'll create smooth transitions between the colored expanse of the prototype and it's black and white environment. Printing Enter (Win) / Return (Mac) on your keyboard to close the Brush Preset Picker:
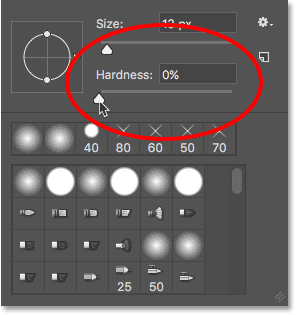
Lower the brush hardness down to 0%.
Step vii: Check Your Brush Options
Before we pigment, make sure that your Brush Tool options in the Options Bar are set to their defaults. The Way option (short for Blend Fashion) should exist set to Normal, Opacity should be at 100%, and Flow should also be gear up to 100%:

The Brush Tool options in the Options Bar.
Stride viii: Resize Your Brush
Position your brush cursor over the surface area where you want to restore the color. And so, resize your brush using the left and bracket keys on your keyboard. The correct bracket key ( ] ) makes the brush larger and the left bracket key ( [ ) makes it smaller. You lot'll want the brush to exist but large enough to surroundings the surface area yous want to colorize. In my case, I'll position and resize my brush so that it surrounds the trees on the right, also every bit the reflection of the copse in the water:

Resizing and positioning the castor cursor over the area to colorize.
Step 9: Click To Restore The Color
And so, with black every bit your brush color, click on the area to restore its original colour. You can likewise click and drag to paint with the Castor Tool, simply the upshot normally looks all-time with merely a unmarried click:
The color in the copse on the right has been restored.
If you lot're not happy with the issue, undo your click by going upward to the Edit menu in the Menu Bar and choosing Disengage Brush Tool. Or, cull the Undo control from your keyboard past pressing Ctrl+Z (Win) / Control+Z (Mac). Either way works:
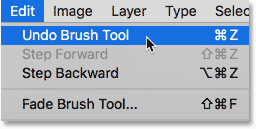
Selecting "Undo Brush Tool" from nether the Edit card.
Then, resize or reposition your brush cursor as needed and try over again. This time, I'll position my brush over the trees on the left, and I'll brand the brush a fleck smaller past pressing the left bracket central ( [ ) a few times on my keyboard:
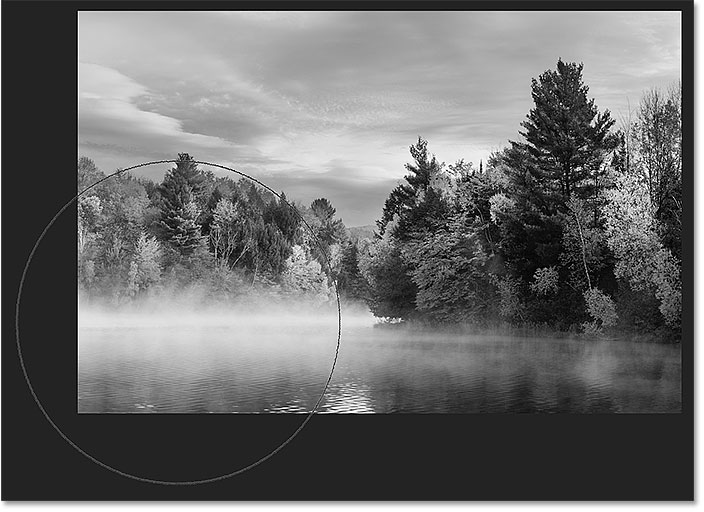
Moving and resizing the brush over a dissimilar area.
I'll click with my brush to restore the color, and hither'southward the issue. I like this 2nd expect amend:
The colour in a different area has been restored.
Footstep x: Fade The Color Using The Density Slider
If we expect at the layer mask thumbnail in the Layers console, nosotros run into the area of black where we clicked. This is the area where the effects of the Gradient Map are hidden, assuasive the original colors from the image on the Background layer to show through:
The layer mask thumbnail showing where we clicked.
If y'all find that the colors you've restored wait besides intense against the otherwise black and white image, or you only want to create a more than subtle result, you can fade the color using the Density slider in the Properties panel. If we await in the Properties panel, nosotros run into that we're currently viewing options for the Gradient Map. To switch to the layer mask options, click on the Layer Mask icon at the summit:

Clicking the Layer Mask icon in the Properties panel.
The Density slider is sort of like an Opacity option for the layer mask. Lowering the density fades the effect of the mask so it has less of an impact. Since we're using the layer mask to restore the original color, we tin fade the color only past lowering the Density value. To lower information technology, click on the Density slider and drag information technology to the left. The further you drag, the more you'll fade the colour. I'll lower mine down to 75%:
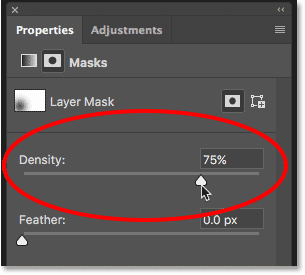
Lowering the Density value in the Properties panel.
And here, later fading the color with the Density slider, is my terminal color splash event:
The final "colour splash" event.
And at that place we have it! That's how to create a quick and like shooting fish in a barrel color splash effect using a Gradient Map aligning layer and a layer mask in Photoshop! Check out our Photo Effects section for more Photoshop effects tutorials!

Source: https://www.photoshopessentials.com/photo-effects/easy-photoshop-color-splash-effect/
Posted by: hillcalmsen.blogspot.com
0 Response to "How To Do Color Splash In Photoshop"
Post a Comment